
Map description[]
A straightforward, if linear, map taking place in an underground base. The map involves a scenario in which you must infiltrate the enemy base, and destroy the prototype tank.
The attackers start in a cavern near the base, and have planted explosives near a discovered wall. The base itself is pretty linear, with just a single U-shaped passage spanning from the cavern to the cargo bay, including a bridge over a lava pool. The cargo bay area has several crates holding several items, many of which are pretty tricky to obtain. Finally, behind a pair of blast doors, there's the tank which must be destroyed.
Due to its simplicity, this map is used as the tutorial map for the Assault ladder.
Objectives[]
The objective is located right at the beginning for the attackers, and cannot be defended. Just shoot and wait.
This objective is composed of three subobjectives: pass the cavern and the lava bridge, and pull the switch to open the garage door. Just passing through these areas is enough to clear these subobjectives. As for the switch, you have to ride an elevator to the top ledge and go all the way to the end. Once done, the garage door will open...
...and you're free to shoot at the tank turret until it explodes. It doesn't require much to make it explode, though, a single shot from any weapon is enough.
Weapons and pickups[]
Weapons[]
| Weapon | Count | Location |
|---|---|---|
W : 1 A : 3 |
Weapon: 1x Defender's first spawn room, U-corridor. Ammo: 3x Garage Door room, near entrance. | |
W : 2 A : 6 |
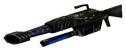
Weapon: 1x Attacker's entrance. 1x Defender's second spawn room. Ammo: 2x Near Destroyable wall. 2x Defender's second spawn room. 2x Garage Door room, near entrance. | |
W : 1 A : 1 |
Weapon: 1x Defender's third spawn room. Ammo: 1x Defender's third spawn room, near Minigun. | |
W : 2 A : 4 |
Weapon: 1x Attacker's entrance. 1x Defender's first spawn room. Ammo: 4x Defender's first spawn room, near Flak. | |
W : 1 A : 2 |
Weapon: 1x Lava Bridge. Ammo: 2x Garage Door room, near Tank door. |


| Weapon | Count | Location |
|---|---|---|
W : 1 A : 3 |
Weapon: 1x Defender's first spawn room, U-corridor. Ammo: 3x Garage Door room, near entrance. | |
W : 1 A : 4 |
Weapon: 1x Attacker's entrance. Ammo: 2x Near Destroyable wall. 2x Garage Door room, near entrance. | |
W : 2 |
Weapon: 1x Attacker's entrance. 1x Defender's first spawn room. | |
W : 1 A : 2 |
Weapon: 1x Lava Bridge. Ammo: 2x Garage Door room, near Tank door. |
| Weapon | Count | Location |
|---|---|---|
W : 1 A : 3 |
Weapon: 1x Defender's first spawn room, U-corridor. Ammo: 3x Garage Door room, near entrance. | |
W : 2 A : 6 |
Weapon: 1x Attacker's entrance. 1x Defender's second spawn room. Ammo: 2x Near Destroyable wall. 2x Defender's second spawn room. 2x Garage Door room, near entrance. | |
W : 1 A : 4 |
Weapon: 1x Defender's third spawn room. Ammo: 4x Defender's third spawn room, near Minigun. | |
W : 2 A : 4 |
Weapon: 1x Attacker's entrance. 1x Defender's first spawn room. Ammo: 4x Defender's first spawn room, near Flak. | |
W : 1 A : 2 |
Weapon: 1x Lava Bridge. Ammo: 2x Garage Door room, near Tank door. |
Pickups[]
| Pickup | Count | Location |
|---|---|---|
| Health | ||
6 |
2x Cavern Entrance, behind some boxes. 2x Curve to the lava bridge. 2x Garage Door room, near the lift. | |
1 |
1x Above a crate, near the Tank door. | |
| Armor | ||
1 |
1x Garage Door room, above a crate below the switch ledge. | |


| Pickup | Count | Location |
|---|---|---|
| Health | ||
6 |
2x Cavern Entrance, behind some boxes. 2x Curve to the lava bridge. 2x Garage Door room, near the lift. | |
| Pickup | Count | Location |
|---|---|---|
| Health | ||
6 |
2x Cavern Entrance, behind some boxes. 2x Curve to the lava bridge. 2x Garage Door room, near the lift. | |
1 |
1x Above a crate, near the Tank door. | |
| Armor | ||
1 |
1x Garage Door room, above a crate below the switch ledge. | |
Turrets[]
| Pickup | Count | Location |
|---|---|---|
2 |
1x Cavern entrance. 1x Garage Door area. |

| Pickup | Count | Location |
|---|---|---|
1 |
1x Cavern entrance. |
| Pickup | Count | Location |
|---|---|---|
2 |
1x Cavern entrance. 1x Garage Door area. |
Walkthrough[]
The map appears in the PC and PS2 version as the tutorial map of the ladder. Hence, this walkthrough is about that.
PC (Retail/GOTY)[]
Playstation 2[]
Tips and tricks[]
Offense[]
- The autocannon on the far side of the dynamited wall can be a major pain in the neck. If you'd like to avoid losing almost half your health as you pass it by, hug the large crate to the left as you enter the room. Then, as you pass beneath the auto cannon, strafe back and forth - don't run in a straight line.[1]
- The defenders are likely to wait for you at the far end of this hall. Charging out of the door one by one, the attackers are almost sure to fail. Wait for at least one teammate if you are confident that the defenders are outside. Secure this room before venturing much farther. The only health boxes you'll enjoy are by the entrance to the bridge.[1]
- A solo attacker has little chance of reaching the garage door switch. Once the bridge is secured, wait for backup before attempting to enter the garage area. Killing defenders who are posted inside the garage may only serve to spawn them behind you, so bottle them up inside until help arrives. If you see a comrade who is likely to trip the switch, stay on the main floor and concentrate all fire on the tank when it appears.[1]
Defense[]
- Attackers always spawn in their starting area, no matter how far they have advanced. Thus, the defenders should strive to keep the battle as close to that spawning spot as possible. Waiting around in the garage area is counterproductive. Always try to bring the battle back to the autocannon area and the hallway that leads from it to the door. Keep the point of attack beyond the two health boxes near the bridge.[1]
Trivia[]
- The beta version of the map had, as the only spawn room, the first one. Also, there was no deck, but instead there was a submarine.
- Unreal Tournament 2004's AS-Glacier is a very changed version of this map retaining the basic idea.
Gallery[]
External links and references[]
- ↑ 1.0 1.1 1.2 1.3 "Assault Map Strategies: AS-Guardia" @ PlanetUnreal
See also[]
| Assault maps for Unreal Tournament |
|---|