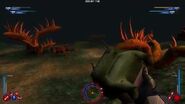
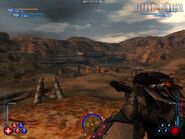
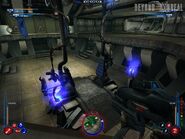
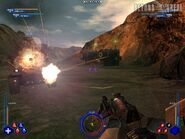
Map description[]
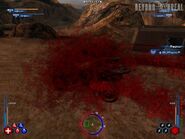
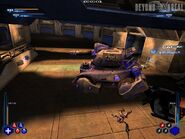
A map set across a huge valley. As usual, both bases re located on opposite sides: the Blue Base is located at the west, and the Red Base at the east. Each base has a frontal entrance (Red/Blue Front Doors), two side entrances (Red/Blue Left/Right Entry) leading to garages (Red/Blue Left/Right Garage) united by a hub corridor (Red/Blue Vehicle Bay) which leads to a corridor via hackable door (Red/Blue Back Entrance) which is also connected to a circular passage (Red/Blue Back Hall, Red/Blue Left/Right Hall, Red/Blue Front Halls) which is not only connected to the the Artifact Node area (Red/Blue Artifact Node) but also to the upper level watchtower above the front entrance (Red/Blue Recon Tower).
The valley itself is a huge area; as expected, the zones near each team's bases are named Outside Red/Blue Base (including the Red/Blue Base Turret and the Blue/Red Left/Right Bunkers), but there's also The Mountain Pass (a passage located in the middle of the map) Campers Summit/Paradise (the mountains located at the north, near the Stronghold Generator area, and the south, near the Gorge Generator area), The Stronghold Generator (a tunnel located in the north, housing one of the four energy sources), The Gorge Generator (an area at the south of the map housing another of the energy sources), The Gorge Turret (an area nearby the generator atop of a hill housing a Garden Turret), Blue/Red Mountain Generator (two generators, one per map half, located near each team's base) Blue/Red Mountain Deploy Point (two deploy points, one located at the southwest of the map, near the entrance to the Gorge, and the other located at the northeast of the map, near the entrance to the Red Base), Blue/Red Mountain Turret (located at the mountains), Blue/Red Stronghold Bunker (two bunkers located at both sides of the Stronghold Tunnel) and Blue/Red Gorge Bunker (two bunkers located at both sides of the Gorge area).
The feature of this map is the hackable door controls, which allow each team to lock or release control for specific doors. There are plenty of these generators in both bases and the Stronghold tunnels, which also accounts for the low amount of vehicles.
Features[]
| Pickup | Count | Location |
|---|---|---|
| Stations | ||
3 |
1x Blue Front Halls. 1x Red Front Halls. 1x Stronghold Generator area. | |
3 |
1x Blue Front Halls. 1x Red Front Halls. 1x Stronghold Generator area. | |
3 |
1x Blue Vehicle Bay. 1x Red Vehicle Bay. 1x Gorge Generator area bunker. | |
| Vehicles | ||
2 |
1x Blue Vehicle Bay. 1x Red Vehicle Bay. | |
2 |
1x Blue Vehicle Bay. 1x Red Vehicle Bay. | |
7 |
1x Northwest area, near entrance to the Stronghold Tunnel. 1x Northeast area, near entrance to the Stronghold Tunnel. 1x Blue Base Turret area. 1x Red Base Turret area. 1x Gorge Turret area. 1x Blue Mountain Turret area. 1x Red Mountain Turret area. | |
| Hackables | ||
6 |
1x Red Vehicle Bay. 1x Blue Vehicle Bay. 1x Red Front Halls. 1x Blue Front Halls. 1x Blue Mountain Deploy Point. 1x Red Mountain Deploy Point. | |
4 |
1x Gorge Generator area. 1x Stronghold Generator area. 1x Red Generator area. 1x Blue Generator area. | |
24 |
2x Blue Back Entrance, at each side of the door to the Back Hall. 2x Red Back Entrance, at each side of the door to the Back Hall. 2x Blue Left Entrance, at each side of the door to the Left Hall. 2x Red Left Entrance, at each side of the door to the Left Hall. 2x Blue Right Entrance, at each side of the door to the Right Hall. 2x Red Right Entrance, at each side of the door to the Right Hall. 4x Red Front Doors, at both sides, two per door. 4x Blue Front Doors, at both sides, two per door. 4x Stronghold Tunnel, at the doors, two per door. | |
Tips and tricks[]
- Focus on getting control of the four generators ASAP. You'll be hacking door controls quite a lot, and you also need the turrets to keep the enemy at bay.
- The Ranger class's Smoke Grenade can be really helpful if you're trying to hack a door and think enemies may be coming through - often they'll just run right by while you finish the work. It's great in the sniper area if you're leaving with an artifact, as pursuers won't be able to see if you left through the right or left teleporters. Combined with a quick boost-dodge jump, it can save your life.[1]
- It's possible to get the Raptor onto the roof of either base directly above the garage doors (left side is easier in each base as you approach) - there are teleporters near by that can get you in and out of the artifact room quickly assuming nobody's blocked off the teleporters with forcefields or booby-trapped them with mines.[1]
Trivia[]
- Garden is the only map present on the XMP demo.
Gallery[]
External links and references[]
- ↑ 1.0 1.1 Various (December 12, 2003). "Tips, tactics and tricks". Retrieved April 16, 2014.
See also[]
| eXpanded Multiplayer maps for Unreal II: The Awakening |
|---|


