| Overview |

Map description[]
Adara is a relatively symmetrical map set in a long, deep canyon. Each power core is located at opposite corners: the Red Core is located in the Northeast corner of the map, while the Blue one is located in the Southwest corner.
Named areas of the map include the following:
- Canyon: The outside area of the map. The following areas aren't named, but we'll give them names for description purposes:
- Eastern Platform: The platform on the Red side which houses the Raptor.
- Western Platform: The platform on the Blue side which houses the Raptor.
- Eastern Support: The area on the Red side which houses the Support Node.
- Western Support: The area on the Blue side which houses the Support Node.
- Eastern Corridor: The big corridor on the Red side which starts at the Red Prime Node and ends on the boosting platform in front of the Red Support Node.
- Western Corridor: The big corridor on the Blue side which starts at the Red Prime Node and ends on the boosting platform in front of the Blue Support Node.
- Eastern Falls: The waterfall on the red side, behind the Raptor platform. Comprises the Red Prime Node.
- Western Falls: The waterfall on the blue side, behind the Raptor platform. Comprises the Blue Prime Node.
- Eastern Base: The Red Base proper.
- Western Base: The Blue Base proper.
- Northern Bridge Passage: The area which comprises both the North Node area and the two passages going to the area.
- Southern Bridge Passage: The area which comprises both the South Node area and the two passages going to the area.
- Bridge: The Bridge going over the Center Node. Doesn't comprise the lower areas, only the bridge itself.
- Central Island: The island in the middle of the map which houses the Center Node.
The map contains seven power nodes:
- Node 1 is the Red Prime Node, located at the south of the Red Base.
- Node 2 is the Blue Prime Node, located at the north of the Blue Base.
- Node 3 is the South Node, located southwest of the Center Node, almost near the Blue Support node.
- Node 4 is the North Node, located northeast of the Center Node, almost near the Red Support node.
- Node 5 is the Blue Support Node, located northeast outside the Blue Base.
- Node 6 is the Center Node, located at the very center of the map.
- Node 7 is the Red Support Node, located southwest outside the Red Base.
Both Prime nodes are located at the top of two platforms, near a waterfall. It's possible to access these nodes on foot by way of strategically-located jumpers or by passing through strategically located caves, if coming from the middle nodes. These caves' entrances are located near the North and South nodes, and end in the Blue and Red Prime nodes respectively.
There are two nodes near both bases, called "Support nodes", located near each team's base. Unlike Unreal Tournament 3's Warfare mode, these nodes are only connected to the Power Core, but have the only functions of providing each team an edge and a secondary place to spawn. Support nodes are rare among maps and link setups, yet in this map the three link setups feature this node. In this case, the teams gain access to the Paladin tank and a Manta.
The North and South nodes are located in refuges near the Red and Blue Support nodes respectively. Both house a Scorpion and a Hellbender each.
Finally, there's the Central Node. This node is located at the second level of another platform, surrounded by tech and bridges. The highest bridge in this area holds a Redeemer. Also, the area itself houses two Energy turrets, a Hellbender and a pair of Mantas.
There are also various boost ramps for certain vehicles.
Link Setups[]
- Default: Each Core is connected to the respective Prime and Support nodes. Both Prime nodes are connected to the North, Center and South nodes.
- Alternate: Same as Default, except that the Blue Prime is connected to the South and Center nodes, while the Red Prime is connected to the North and Center nodes. South and North are also connected to the Center Node. In this Setup, the Center Node becomes a bottleneck.
- Alternate 2: Same as Default, except that both Primes are only connected to the North and South Nodes. In addition, the North and South Nodes are connected to the Central Node, giving it somewhat of a "wildcard support" status.
Weapons and pickups[]
Weapons[]
| Weapon | Count | Location |
|---|---|---|
W : 2 A : 4 |
Weapon: 1x Blue Base, in a container near the Power Core. 1x Red Base, in a container near the Power Core. Ammo: 2x Near the Blue Base weapon. 2x Near the Red Base weapon. | |
W : 2 A : 4 |
Weapon: 1x Blue Base, western entrance, inside of a container. 1x Red Base, eastern entrance, inside of a container. Ammo: 2x Near the Blue Base weapon. 2x Near the Red Base weapon. | |
W : 1 |
Weapon: 1x Bridge, middle. |


Weapon Lockers[]
| Items | Count | Location |
|---|---|---|
    |
6 | 1x Central Island, eastern side. 1x Central Island, western side. 1x Eastern Falls, near the Red Prime Node. 1x Eastern Platform. 1x Western Falls, near the Blue Prime Node. 1x Western Platform. |
  |
4 | 2x Red Base. 2x Blue Base. |
|
6 | 1x Eastern Support, near the Red Support Node. 1x Western Support, near the Blue Support Node. 2x Northern Bridge Passage, near the North Node. 2x Southern Bridge Passage, near the South Node. |
Pickups[]
| Pickup | Count | Location |
|---|---|---|
10 |
1x Eastern Platform. 1x Near the Red Prime Node. 1x Western Platform. 1x Near the Blue Prime Node. 1x Red Support, near the Red Support Node. 1x Blue Support, near the Blue Support Node. 1x Northern Bridge Passage, near the North node. 1x Southern Bridge Passage, near the South node. 1x Central Island, eastern side. 1x Central Island, western side. |
Vehicles[]
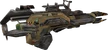
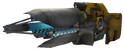
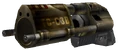
| Vehicle | Count | Location |
|---|---|---|
6 |
1x Blue Base, near the Power Core. 1x Red Base, near the Power Core. 1x Central Island, eastern side. 1x Central Island, western side. 1x Blue Support, near the Blue Support Node. 1x Red Support, near the Red Support Node. | |
2 |
1x Western Platform. 1x Eastern Platform. | |
6 |
1x Eastern Falls, near Red Prime Node. 1x Western Falls, near Blue Prime Node. 1x Northern Bridge Passage, near North Node. 1x Southern Bridge Passage, near South Node. 1x Blue Base, near the Power Core. 1x Red Base, near the Power Core. | |
3 |
1x Central Island, lower level. 1x Northern Bridge Passage, near the North Node. 1x Southern Bridge Passage, near the South Node. | |
2 |
1x Eastern Corridor, near Red Prime Node. 1x Western Corridor, near Blue Prime Node. | |
2 |
1x Red Support. 1x Blue Support. | |
2 |
1x Red Base, upper level entrance. 1x Blue Base, upper level entrance. | |
2 |
1x Blue Base, western entrance. 1x Red Base, eastern entrance. | |
6 |
1x Blue Base, lower level, guarding both entrances to the Power Core. 1x Blue Base, above a container near the Power Core. 1x Western Platform. 1x Red Base, lower level, guarding both entrances to the Power Core. 1x Red Base, above a container near the Power Core. 1x Eastern Platform. |


Tips and tricks[]
Trivia[]
- This map comes with the ECE Bonus Pack, alongside ONS-IslandHop, ONS-Tricky and ONS-Urban.
- The map features two notes only viewable in the editor or by using a package analyzing tool such as UTPT:
- The rough translation of both sentences is the following:
External links and references[]
See also[]
| Onslaught maps for Unreal Tournament 2004 |
|---|
| XP Bonus Maps: |
| ECE Bonus Pack maps: |