| Map stub |
|---|
| This article is a stub. You can help the Unreal Wiki by expanding it. What needs to be done: Add the missing info. |
Map description[]
Weapons and pickups[]
Weapons[]
| Weapon | Count | Location |
|---|
Weapon Lockers[]
Pickups[]
| Pickup | Count | Location |
|---|
(*) Rows marked in red are required for the "Like the back of my hand" achievement.
Vehicles[]
| Vehicle | Count | Location |
|---|
Walkthrough[]
Act II: With Caesar's Coin - Main branch[]
Now it's time for Vehicle CTF. Capture the Flag... with vehicles! Before the match begins, Jester introduces you to the basics of the gamemode. The key point to remember here is that, unlike in Unreal Tournament 2004's, hidden gamemode, you can't get the enemy flag (sorry... FLaG) into a vehicle, and that you can use the hoverboard to carry the flag. You're greeted with a dialog:
- Othello: "Damn! It's Capture The Flag... with vehicles?"
- Jester: "Yeah, if you get their flag, use your hoverboard."
This dialog triggers once you first get the Longbow AVRiL:
- Jester: "Grab the AVRiL to take out those vehicles!"
- Bishop: "It's like sniping tanks rather than men."
- Othello: "Yeah, it's useless on infantry."
And this one triggers after the Redeemer spawns:
- Othello: "WHOA! Is that a Redeemer?"
- Bishop: "It is a coward's weapon."
- Jester: "Yeah! Sign me up for getting five coward kills with it, then. Where is it?"
- Othello: "West of the Goliath tank."
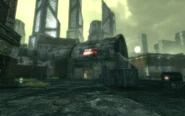
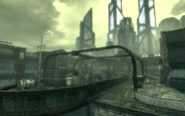
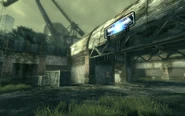
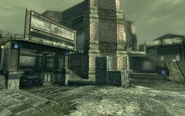
This map can be extremely irritating. The bots have this tendency to prioritize human players over other bots. Normally it's not too big of a deal, but it becomes obvious when you've got a large number of bots or in this case, a bot in a tank. The map has a neutral Goliath that spawns and travels along a conveyor before being deployed right in the middle of the level, in an enclosure. It's effectively a very large turret. Each team also has Hellbenders and Scorpions in their garage. Aside from the Tank, the middle of the map is also home to a Shield Belt and a Redeemer. There are a few unique weapons on this level. The Slow Field Generator is effectively a trap which, when activated, causes anyone caught within it's radius to move very slowly. Works for catching (or saving) flag runners. There is also an EMP Mine at each base which disables vehicles.
There are a few ways in\out of the base, but ultimately they lead to one of two directions. The 'Street' curves around and leads directly to the loading docks for which the level gets it's name. The other is more of a back-alley which circles behind some obstructions, making it (nearly) safe passage from the troll in the Tank. The back alley also has body armor - in both bases - and health along the way. You can use the Scorpion's Speed Boost to hit the pipes in the center of the Cargo bay and use them as a ramp to launch you onto the other side of the field, but since the bots use the street almost exclusively, it wouldn't be very wise to use it regularly.
Generally, the best way is to just get into the base as quickly as possible and then use the back alley route as an escape. The enemy usually only has one bot defending the flag room with a link gun, flak cannon or shock rifle which is easy enough to get past, but the others will cut you off in the parking-garage-like buildings. You can use your hoverboard, but only after you've rounded a corner where the enemy has no line-of-sight, and only for a few seconds at a time. It's very easy to get knocked off the board when you think you're safe. If you can capture the flag one time, all you have to do is hold out for the remainder of the mission.
Another option is to mercilessly seize and exploit the tank in the center of the map to make it virtually impossible for the bots to leave their base. This becomes most useful on the harder difficulties where flag running becomes ever more perilous. Somewhat counter-intuitively however, you don't want to actually kill the bots perpetually. If you kill them, they respawn in their base, and that means they'll attack your allies when they come to take the flag. You want to time it so that their flag gets taken while they are out front. They'll turn around to go ambush the flag carrier, and if you kill them they'll respawn at their base. Too far away to do anything about the flag runner, least of all without you forcibly sending them ome again. If the Tank is destroyed, a new one will travel along a conveyor which drops it onto the track.
Beating this mission unlocks the 'Tactical Diversion' Card. Save it for a rainy day. After the mission you can choose between WAR-TorlanDelta (Mission 122) and CTF-Hydrosis (Mission 008). This is effectively a defense\offense decision, deciding whether you want to focus on the immediate war with the Axon, or prepare for a future war with the Necris. Taking CTF-Hydrosis first is not only a harder level but can lead to some of the hardest missions in the chapter - if not the entire campaign. This is not set in stone however. I suggest taking Torlan, both because it is an easier mission which leads to an easier campaign, and because it makes more sense in the context of the story that Reaper would be more interested in a long-term plan against the necris than this trivial war with the Axon.[1]
Act II: With Caesar's Coin - 4v6 Handicap[]
You'll be outnumbered by two this time, making it significantly more difficult than the early mission in this map. It can be hard to get even one capture on this mission and if you let your guard down the enemy can win very quickly. Your best bet is to play to overtime without doing so and still lose on a rough transition. The best bet seems to be to alternate between the Goliath and a flag attempt. The Goliath keeps the enemy in line and prevents them from getting too many people on your side of the board, reducing the chance that somebody might capture your flag in the time between your tank's destruction and your flag run. It also reduces the likelihood that the tank will fall into enemy hands.
For the actual run, the Shield Belt would help immensely if you can get a hold of it. Either way, you want to approach from the Hellbender side and stay away from midfield where the enemy vehicles congregate. Aside from avoiding a lot of unnecessary damage, it also provides you a small area to restock on health and armor before you enter the flag room. There will probably be two defenders guarding the flag since they can afford it. If you drop down into the scorpion garage and then use the jump pad in the back, you'll come up right in front of one of the defenders. If you turn around and step onto it, you can come up facing him and can gib him with the Flak Cannon before he has a chance to return fire. Then you can grab the flag and jump over the rail to the Hellbender exit.
If you moved quickly out of the base - and especially if you have the shield belt - you should have enough time to use your hoverboard to get behind the crates. You may even be able to reach the garage. Take the same route home that you took to reach the base and hope the enemy didn't take the tank while you were away. If they did, you'll probably have to kill the tank and try again, but sometimes you can escape before it targets you. The redeemer can make short work of the tank, just don't use the alt-fire or they will shoot it down with their incredible aim.[1]
Act II: With Caesar's Coin - 4v5 Handicap[]
You're outnumbered, but only by 1 bot. This isn't as hard as some incarnations. You'll want to focus on the Tank in the center of the map to keep it out of enemy hands. You can use this to keep the enemy pinned in their base, but your allies will have difficulty getting to the flag if the entire enemy team is there. To combat this, you can let a few of the enemies escape to where they think they are on offense. When your allies sneak in and get the flag, go ballistic (literally) and start destroying the enemies at midfield. They'll go back to their base where they are hopefully too far away to do any good. If your tank gets destroyed, try to sneak into the enemy base for a capture. The shield belt will help immensely with this, so grab that first if you can.
You want to approach from the Hellbender side and stay away from midfield where the enemy vehicles congregate. Aside from avoiding a lot of unnecessary damage, it also provides you a small area to restock on health and armor before you enter the flag room. There will probably be two defenders guarding the flag since they can afford it. If you drop down into the scorpion garage and then use the jump pad in the back, you'll come up right in front of one of the defenders. If you turn around and step onto it, you can come up facing him and can gib him with the Flak Cannon before he has a chance to return fire. Then you can grab the flag and jump over the rail to the Hellbender exit.
If you moved quickly out of the base - and especially if you have the shield belt - you should have enough time to use your hoverboard to get behind the crates. You may even be able to reach the garage. Take the same route home that you took to reach the base and hope the enemy didn't take the tank while you were away. If they did, you'll probably have to kill the tank and try again, but sometimes you can escape before it targets you. The redeemer can make short work of the tank, just don't use the alt-fire or they will shoot it down with their incredible aim.
Tips and tricks[]
Trivia[]
Gallery[]
External links and references[]
See also[]
| Vehicle CTF maps for Unreal Tournament 3 |
|---|
| Xbox 360 originals: |
| Titan Pack maps: |


