| Map stub |
|---|
| This article is a stub. You can help the Unreal Wiki by expanding it. What needs to be done: Add the missing info. |
Map description[]
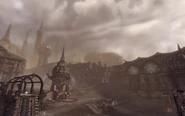
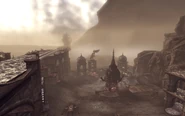
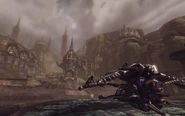
Sandstorm is an axially symmetrical U-shaped map with a large wall structure that seams to be a part of the ruin of an aqueduct that separates the two main areas. There are two ways through it, of which only the northern passage is accessible by any vehicles and on foot. But you can also climb on top of the structure using the elevators on the north site or the large stair case in the middle, that can be used by a Scavenger or a player using Jump Boots.
In the middle of the map there are a few terraces which can be climbed by the Darkwalker, Scavenger, Viper or with the Jump Boots to reach the top of the aqueduct. Other ways to the top are the two smaller and one larger lifts in the northern passage way. Although only activated by players on foot, the larger lift is big enough to transport a vehicle. A Scavenger can also climb up the larger lift's shaft.
The map also has several towers and connected walkways. The northern two towers and those south of the Fury "airfields" contain the Sniper Rifle and the AVRiL.
Like the name suggests, a sand storm regularly sweeps over the map, greatly impairing vision.
Weapons and pickups[]
Weapons[]
| Weapon | Count | Location |
|---|
Weapon Lockers[]
Pickups[]
| Pickup | Count | Location |
|---|---|---|
| Health | ||
16 |
- | |
8 |
- | |
1 |
In the middle of the northern passage way. | |
| Armor | ||
2 |
At the north of each northern Sniper/AVRiL tower. | |
2 |
At the north of each Fury "airfield". | |
| Powerups | ||
2 |
On each of the northern Sniper Rifle/AVRiL towers. | |
| Deployables | ||
2 |
In front of each of the central buildings with the Flak Cannon. | |
(*) Rows marked in red are required for the "Like the back of my hand" achievement.
Vehicles[]
| Vehicle | Count | Location |
|---|---|---|
2 |
At the south of each flag base. | |
2 |
On an open area between the flag building, the southern sniper/AVRiL tower and the inner-most of the southern buildings. | |
2 |
Between the Darkwalker ruin and the Flak Cannon building. | |
2 |
Near the outer-most southern spawn area on each side. | |
2 |
In the ruins on the east and west sides. |
Walkthrough[]
Act V: Disposable Assets[]
So you and your team finally arrive on Omicron 6. The landing wasn't proper, as you came to a desertic area. Cue the opening dialogue:
- Reaper: "Seems a little too easy..."
- Jester: "So much for the Necris defense grid!"
While Sandstorm might be fun multiplayer, it is the single worst example of vehicle & bot AI in UT3. If you so much as stick your head around the corner at the wrong time, you die. The level consists of wide open areas for the omniscient bots to shoot at you in, with very little cover for you to utilize. Your bots are incapable of securing the flag - and it's no wonder. Even with all the tricks in the book it's difficult. Moreover, you're outnumbered. This is a big enough deal in deathmatch when you're fighting infantry, but it's even worse here. The Nemesis, Dark Walker, and Fury are particularly irritating because their weapons do not behave normally when bots use them and they can kill you at just about any time. Worse still, your bots do not follow you or assist you intelligently inside the enemy base. You have to get in, get the flag, and get all the way back to midfield (at *least*) before you can even capture the flag one time. Oh, and of course, there's the Sandstorm itself:
- Bishop (First sandstorm hits): "And there came a storm of sand..."
- Othello (Third sandstorm hits): "This sandstorm is playing hell with my optics."
- Jester: "They can't see us either. Take advantage of it."
You can use the Darkwalker and Nemesis to great effect on this level, keeping them pinned in their base and preemptively destroying their vehicles from up near the ruins. Unfortunately all this does is allow your bots to get *to* the flag so the enemy infantry can kill them. On easy\normal, where the bots are less perfect, you can use the Fury to fly over the wall and destroy their Nemesis, Fury, and Dark Walker before anyone even gets inside them - but on Hard\Insane they will shoot you out of the sky too quickly to justify that approach. Even on Easy\Normal, it's a useful tactic but the bots still can't secure any points for you so you'll have to get out at some point.
Frontal assaults simply do not work. Again, the Dark Walker and Nemesis will kill you instantly if you peek around the wrong corner and they are designated to the main road. The only option that works is to fly over the wall and attack from behind. There are three ways to do this. On the inside of the big archway at the center of the level, there is a lift which will take you up on top of the wall. From there, you can go to the far end and jump off onto the stone buildings inside the blue base, and then to the ground. The catch is that you have to expose yourself to hostile fire, it takes too long to get there, and you'll sustain damage doing so. The second is to fly over the wall directly with the fury and land it behind the blue flag building and the third is to use the Scavenger or Viper to jump up the ridges on the divider. Of the latter three, the Scavenger is the least viable. It takes longer to jump over the divider and is less survivable than the Fury. The best option is to either use the Viper to jump onto the divider and then down behind the enemy flag building, or fly over it with the Fury. The Viper seems a little bit faster and easier to use sneakily, but it's easier to defend yourself with the Fury.
You'll want to stop on the wall for a while before actually jumping down. Watch the enemy Dark Walker and Nemesis. You don't want to jump down when they are in the blue base, so wait until they drive into the archway to attack your base. Once they are gone, they won't be able to shoot you when you grab the flag. When you actually do jump down, kill anyone near the flag by shooting them with the Fury or running into them with the Viper. There is usually one person with the rocket launcher standing near the flag. If you don't kill them, they will become a problem later in the run. When you kill them, they will respawn somewhere else, hopefully too far away to catch up with you.
Grab the flag and - if you survive the massive wave of plasma that flies at you - hit the jump pad just slightly to the northeast of the flag. This will propel you up onto the upper level of the ruins, which has a long catwalk to some health. Don't use your hoverboard yet. Just run\dodge until you make it to the ramp, then pull out your hoverboard and hit the ramp, jump at the top of the ramp so you'll clear the gap, and put away your hoverboard in the air. The momentum should put you down on the other side, where you can continue your run. If you didn't kill the defender earlier, he'll cut you off here, along with any other infantry who's attention you've grabbed. Kill them if you can. Sometimes you get here before they do, and have time to pull out your hoverboard again to reach the archway. Otherwise just run serpentine. Backwards if you have to.
Unfortunately this is a gamble no matter what you do. If your team mates love you, then the archway is clear and the cavalry will show their affection by melting the enemy's face. If they don't, then you'll round this corner and find yourself staring down the barrel of a Dark Walker\Nemesis' Turret. Sometimes it's a scavenger. If it's a scavenger, shoot it with the minigun until the pilot ejects and then shoot him with the minigun until his pilot ejects, etc. We use the minigun because it's more reliable damage than the rocket launcher- and you need all the insurance you can get to maximize the 'chance' that you'll succeed.
If you die in the tunnel, you *may* get lucky enough that one of your bots will arrive and take the flag before the enemy can return it. Even if everything goes right, it can all vanish suddenly with a laser blast from the sky at the base of the red flag post when the enemy fury pilot comes to steal your flag. If you do manage to get one capture, switch all of your efforts to securing the tunnel. The enemy can't return the flag without passing through here, and you're better defended here than you would be elsewhere. It's much, much easier to defend than attack so it shouldn't be a problem to hold the flag until the timer runs out. In fact, by the time you succeed in capturing the flag, you'll probably already be in overtime.[1]
Tips and tricks[]
Offense[]
- Right before the sandstorm hits, you can see it coming from the south. Also, you can hear the wind getting louder. This is the perfect time for grabbing the enemy flag, taking advantage of the enemy's limited vision.
- The flag carrier can escape through the southern passage way if he or she has Jump Boots, which is a big advantage. To do that, he or she has to do a dodge jump with the Jump Boots from the edge of the small tower near the passage. This works easily on both sides on the map. Additionally there's a rock on the red side, where you can also jump onto with the help of Jump Boots, but this requires two jumps to do so instead of one and isn't as fast as the jump from the tower.
- The large lift in the northern passage way can be used to bring a Nemesis to the top of the aqueduct. All other ground vehicles should use the side terraces, though.
- Get a pilot with you in the Fury while you leap the wall with the Viper. Grab the flag, and then grapple the fury for a quick extraction.
Defense[]
- There's a Berserk power-up on each of the northern sniper/AVRiL towers. Use the Jump Boots to reach it via a lift jump or just land on the tower with the Fury.
Trivia[]
Gallery[]
External links and references[]
See also[]
| Vehicle CTF maps for Unreal Tournament 3 |
|---|
| Xbox 360 originals: |
| Titan Pack maps: |


