| Map stub |
|---|
| This article is a stub. You can help the Unreal Wiki by expanding it. What needs to be done: Add the missing info. |
Map description[]
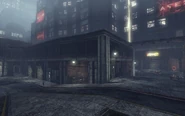
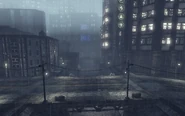
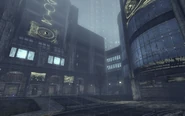
A map taking place in a city. Each side of the city has a Power Core and a Power Node. At the north of the map, there's the main choke point of the map in the form of the Center Node, while another choke point is located at the south, between both bases, the Tank Node garage. The Cores and the Tank Node are divided from the rest of the map by way of an empty canal.
Link Setups[]
- [Regular]: There's a straight line that goes: Blue Power Core - Blue Prime Node - Center Node - Red Prime Node - Red Power Core. The Tank Node acts as a support node.
- Two Fronts: Same as Regular, but also connects both Prime Nodes to the Tank node, leaving the map without support nodes.
Weapons and pickups[]
Weapons[]
| Weapon | Count | Location |
|---|
Weapon Lockers[]
Pickups[]
| Pickup | Count | Location |
|---|
(*) Rows marked in red are required for the "Like the back of my hand" achievement.
Vehicles[]
| Vehicle | Count | Location |
|---|
Walkthrough[]
Act II: With Caesar's Coin[]
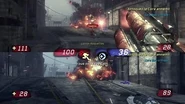
WAR-Downtown will be harder than the other Warfare missions we've played so far. It's similar to WAR-Serenity, in that all of the nodes are linked in succession with an unlinked support node which, again, spawns a tank. This time, the tank is a Goliath, and there is an extra node in the middle to fight over. Furthermore, every node has an orb spawner, so it will be a tug of war between the orb carriers. Even worse, the enemy starts will all of the nodes already in their control, so your core is immediately vulnerable.
- Othello: "Where is everybody?"
- Bishop: "So many lost souls..."
- Reaper: "Looks like Axon declared martial law."
- Jester: "Hmmm... you'd think they were afraid of a small, experienced team of commandos that might be operating in their territory."
- Othello: "You mean like us?"
- Reaper: "Oh yeah! Twin Souls -- Strength of the Fist!"
Your role in this mission is to stabilize the situation, putting you in a support role. You're gonna be on defense this time, a defensive-offense, and your bots are all on offense by default. Jester will pretty much camp the orb, so it's difficult to get a hold of, and the enemy will be constantly pushing on your base as well. Your bots will basically ignore the tank node, and the Goliath it spawns, while the enemy team - Lauren in particular - will not. This means your first order of business is to take the Tank node and use the Goliath it spawns to help your allies push the enemy off your Prime Node and back to the center node. You can park your Goliath near your Prime Node, safely away from most of the fighting, and use it to shut down their Orb carrier, but they can circumvent this by taking the Tank node out from under you so it's better to be quick and try to get the center node back to neutral status. If you lose your goliath, go get another one. Taking out the center node is difficult because they've got a laser turret - and a number of Scorpions - which will decimate your tank. If you can just destroy the node whether or not you claim it yourself (using abandoned enemy vehicles as cover sometimes works) they will lose these vehicles until they can recover it, making it easier for you to capture and hold the node yourself. At this point, whoever controls the tank node is 'winning'.
For the most part, the idea of the early game is to keep the Tank node under your control and use it as a counterweight to prevent the enemy from reclaiming anything your allies take from them. This is the hardest part. Once you've got control of both the center node and the tank node, the dynamics change. For one, you don't have to do anything else except maintain control and you will win by attrition if the time runs out. At this point you might find it better to switch entirely to defense using the Orb to shield & hold the center node while your allies fight over the enemy prime node. If the enemy prime falls, you can then run over and build a friendly node in it's place, and repeat the process there while your allies attack the enemy core. Another option might be to assist attacking the enemy prime node yourself, although this can be difficult and potentially costly if the enemy counter-attacks.
Once you have their prime node, you can attack their core. On the easier settings, this is more productive than defending, because the bots are very slow, and it's easy to recover the node if they destroy it. On the harder levels there's less room to play around, and a possible good approach is to be conservative and let the enemy wear out slowly-but-surely, using the now-obsolete orb to defend the enemy prime node and preventing them from getting back up. If you have an opening between waves of enemies, you can run over and take the Tank node back at this point (if you lost it). You can actually park the Goliath inside the prime node building, making it impossible for the enemy to reclaim their node.
If you decide to attack their base, there is an alleyway off the main road that leads to their core. You can get in and shoot it a couple times before the bots catch on. If you've got a secure hold on the prime node and the enemies are siege in their base, you can drive the Goliath through their front gate without much fuss as well. All-in-all the first 50% is the hard part and it's all downhill from there.[1]
After 2.3a.2a.4 or 2.3b.3b.3, the player must choose to either ally with Axon (Diesel) or defeat them (Defiance).
Tips and tricks[]
- In regular setup, the Tank Node is a distraction. Focus on taking and holding the links.
Trivia[]
Gallery[]
External links and references[]
See also[]
| Warfare maps for Unreal Tournament 3 |
|---|
| Xbox 360 originals: |
| Titan Pack maps: |


